Entries in tutorial (3)

Thursday
Apr302009

tutorial: flower collar

so, i had a birthday yesterday. in honor of this new year and decade of my life (which i think should be pretty good), i give you the gift of a previously promised and overdue tutorial. i'm generous now that i'm in my thirties. 

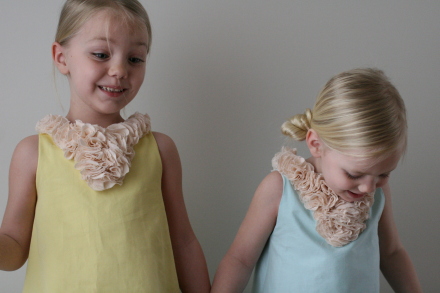
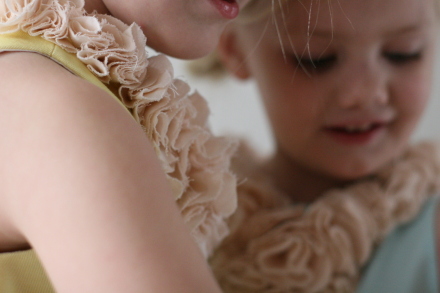
here we go. how to make this collar (or something like it):


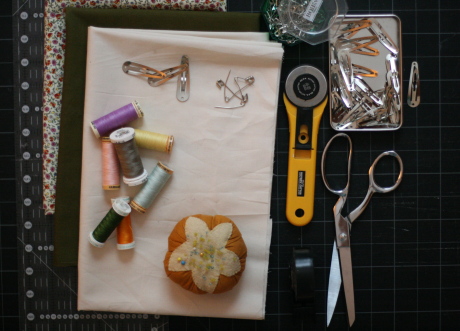
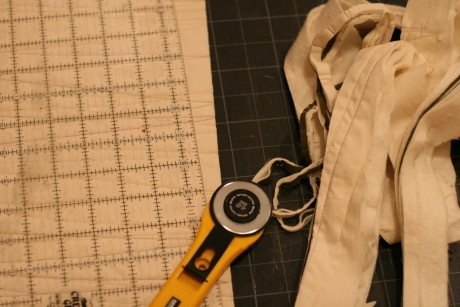
you need: lightweight fabric (i used shot cotton on the easter dresses and will be using it, in a different color, for the tutorial today), scissors, needle, thread, thimble. that's it. 

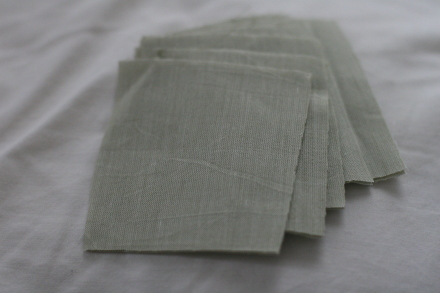
:: with fabric folded, cut a strip. the size varies depending on the size of flowers you want in the end, here i cut a 3" strip. keeping fabric folded, cut strip into squares. (you do not need to be exact with any of this).


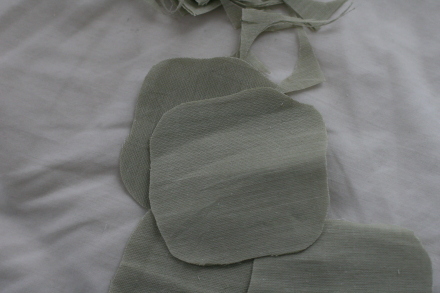
:: trim the corners off the squares, making a flowery square. these "squares", with two layers each, will be used to make one flower.


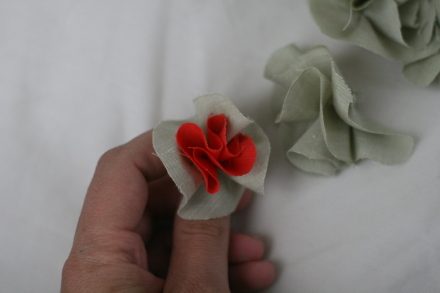
:: making the individual flowers. pinch and gather first layer of "square" in the middle so it looks (wow, you're going to get tired of this word) flowery.


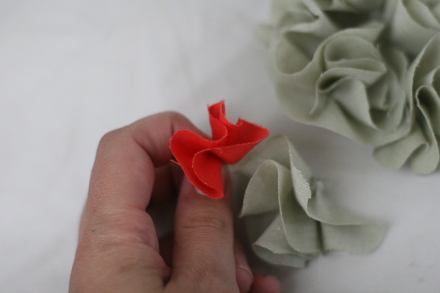
:: while holding the middle of the first layer secure, bring second layer to it, gather around the pinched part. move and gather fabric until it looks good.


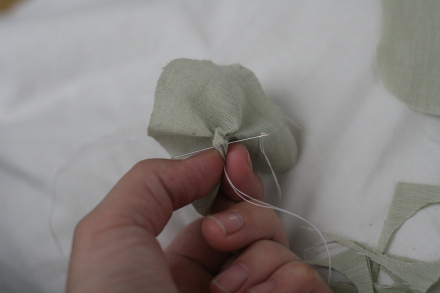
:: stitch the flower through the pinched stem to hold it all in place. i usually run the needle and thread through four times or so, just enough that all the gathering/ruffling is secured. knot and cut thread.


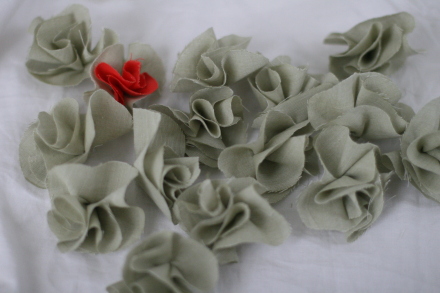
::repeat many many times. you'll need a lot of these flowers.


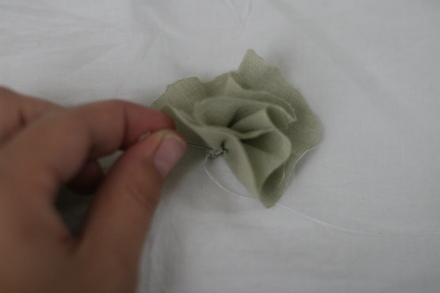
:: attach flowers to fabric (shirt, dress or whatever you're making flowery) one at a time. if you have children who, like mine, are really good at pulling on things, you'll want to secure each flower very well with several stitches before moving to stitch on the next. this is where the thimble comes in handy. pushing that needle through again and again gets rough on the fingers. 


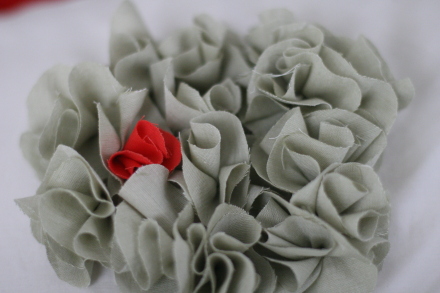
:: depending on the look you want, you can either pack them really tight (i did this for the easter dresses) or you can keep it a little bit looser and let each individual flower show a bit more. here i have 15 flowers. the first picture shows them tight, the second a bit looser. great either way. 

that's it! just stitch them on in the shape you want and you're done. so easy, right? just plan on spending a little time on it. it's one of those great projects to do while listening to this american life. especially act one of this episode. break-ups, phil collins and starlee kine. so good. 

...

also, there were some questions about the specifics of the easter dresses. unfortunately, other than the flowers (kaffee fassett shot cotton in blush) i don't know what the fabrics are, exactly. ruthie's light blue is either kona or p+b color spectrum while eve's yellow dress is a lovely cotton twill from my stash. 

Monday
Jan262009

quilt how-to

alright, so here is the tutorial for my go-to quilt. just after snapping the first photo, yesterday became, what seemed like, the darkest day of the year. . . so the lighting is bad, but i think you'll get the gist of what i'm saying all the same. . . 


materials: 

fabric. 100% cotton. two solids for front and back. third fabric for binding, can be patterned or solid, you choose. the beauty of this quilt really lies in its simplicity and flexibility. 

batting. i only use 100% cotton, mid or thinnest loft. 

thread. lots of thread in as many (or as few) colors as you choose. 

tools. rotary cutter, cutting mat, masking tape, quilting pins, binding clips. 


first. cut fabric to desired sizes. for a quilt size guide, see here. depending on the size of the quilt, you may need to do some piecing. be sure to leave batting just bigger than front and back pieces.


second. baste the quilt. very important to do a good job basting so there is no unfortunate pinching or clumping of fabric while quilting it on the machine. usually best to do this while kids are in bed since their little feet cannot resist dancing (or crawling) on large pieces of fabric stretched on the floor. begin by taping the backing to the floor as taut as possible. don't be afraid to pull. gently lay and smooth batting over taped layer. follow with "front" of quilt. smooth out and get fabric as flat as possible. starting in the center, use quilting pins (essentially safety pins with a bent arm) to secure the the three layers together.  work your way out in a circle, smoothing and flattening the "quilt sandwich" as you go. the fabric should be totally smooth. be sure to go all the way to the edges.


third. machine quilt. the fun and most time consuming part. with a walking foot on your machine, begin the quilting at one edge of your quilt. (quilt "parallel" to the shorter side, easier to manage). quilt at very a slight diagonal. removing basting pins as you go (don't sew over them, or let your daughter take control of the pedal for you while she also watches a show about mermaids. . . you'll regret it). when you reach the opposite edge of the quilt (going beyond edge of fabric, into the batting a bit) lift presser foot but keep needle in "down" position. rotate the blanket and quilt to the opposite edge at a slight angle once again. repeat until you quilted the length of the quilt. your quilt will look something like this:

switching out thread colors (or keeping the same) repeat entire process again and again and again until you are satisfied with the amount of quilting. this uses a lot of thread but looks really great. just be sure to go slowly, feed quilt through at an even pace and watch that the fabric doesn't get gathered or bunched while quilting. the walking foot helps a ton with this, as does proper basting, but keep watch just in case. if some of your lines aren't perfect, don't worry, the other quilting lines will distract, and washing and drying does wonders for covering up small mistakes. 


fourth. trim quilt. to get ready for binding, the quilt sandwich needs to be "squared" and trimmed. i like to trim two sides at once, folding it in half before evening it up and trimming. clear ruler and rotary cutter. check that all layers go to the very edge after trimming. 

fifth. bind quilt. i use the "double fold mitered corner" binding method. the same method taught in denyse schmidt quilts book and that was taught at my quilting class at purl. i love this method, and it deserves it's own tutorial. luckily, there are a few out there. hand stitching the binding is ideal, but if you are short on time, go ahead and use your machine to stitch the binding down. don't feel bad, it will still look great. (especially in the light of a much brighter day).

sixth. after binding and trimming all loose threads, throw your quilt into the washer and dryer. pull it out, admire it, wrap it for a gift or wrap yourself up inside. feel great. you just made a quilt, and it's modern and cool and probably took you less than 10 hours.  

Thursday
Mar202008

eggs and cabbage

Img_2728

for the last six years i've been dyeing my eggs with vegetables and spices. i continue to love the process and the results. aren't those colors amazing? totally worth the combined stink of boiled cabbage, turmeric and beets looming in my apartment for a day or so. . . and apparently filling the hallways of our building, based on the amount of air freshener that a neighbor sprayed outside my door yesterday. sorry neighbors. i'm just here to spread easter cheer.

there are two ways to dye your eggs. the first is boiling/simmering your eggs in the dye. this generally results in really saturated, even colors for 30 minutes. the second is "cold-dipping" them in strained very warm to room temperature dye, anywhere from 5 seconds to hours depending on the desired color. this results in more translucence and subtlety and also requires regular rotation of the eggs if you want even coloring.

the general ratio for making the dye is 1 cup of vegetable (chopped if necessary) to 1 cup of water. for turmeric, add 3Tbs to every quart of water. bring to a boil and simmer for 30 minutes. add about 2tsp (i never measure) vinegar in the dye after about 20 minutes.

this is what can result- with a billion variations in between.

Img_2779

onion skins. (from left to right) first egg cold-dipped for about 30 minutes. second boiled in dye for 30 minutes. third rubbed with vinegar, wrapped in onion skins (while raw) then wrapped and tied in cheesecloth and boiled for 30 minutes. i love the marbling. the colors that come just from onion skins always surprise me.


Img_2782

red cabbage. first egg cold dipped in warm dye for 20 minutes. royal blue left in dye for an hour or so. marbly egg boiled with the cabbage leaves in the pot for 30 minutes.


Img_2759

turmeric. middle egg boiled for 30 minutes. other two left in warm/hot dye for about 15 minutes. i had some lovely and subtle yellow shades that i had just cold dipped, but ended up dipping them into other colors.


Img_2766

turmeric and cabbage. various combinations, various lengths. since these two dyes are the quickest and most obvious, i played a lot with them last night as i was teaching some ladies at church the glory of natural dyeing.


Img_2761

beets. first cold dipped for about two hours. second boiled in beet dye for about 40 minutes. third cold dipped for about an hour. beets are always a little disappointing, but i like having some sort of pink-ish in the mix.


Img_2763

coffee. first time using coffee and probably my last. i was hoping for a really dark brown but ended up with this after nearly an hour of simmering and another hour sitting in the dye. the lighter was about 40 minutes in the hot dye. perhaps the coffee i made was too weak? it looked really really dark to me but i have no idea what i'm doing with coffee. chip had to ask the editing studio he was working at that day for the stuff i used. . .

so now we have a lot of beautiful colors to look at, some dye i'm considering using for fabric and two dozen hard boiled eggs i'm hoping to find a use for.