
quilt how-to
alright, so here is the tutorial for my go-to quilt. just after snapping the first photo, yesterday became, what seemed like, the darkest day of the year. . . so the lighting is bad, but i think you'll get the gist of what i'm saying all the same. . .
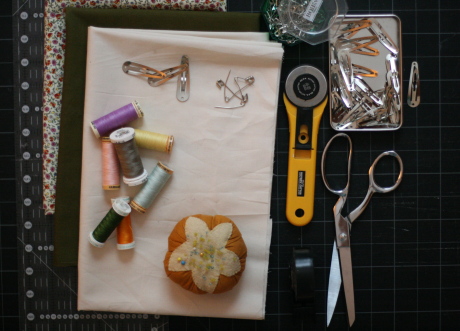
materials:
fabric. 100% cotton. two solids for front and back. third fabric for binding, can be patterned or solid, you choose. the beauty of this quilt really lies in its simplicity and flexibility.
batting. i only use 100% cotton, mid or thinnest loft.
thread. lots of thread in as many (or as few) colors as you choose.
tools. rotary cutter, cutting mat, masking tape, quilting pins, binding clips.
first. cut fabric to desired sizes. for a quilt size guide, see here. depending on the size of the quilt, you may need to do some piecing. be sure to leave batting just bigger than front and back pieces.
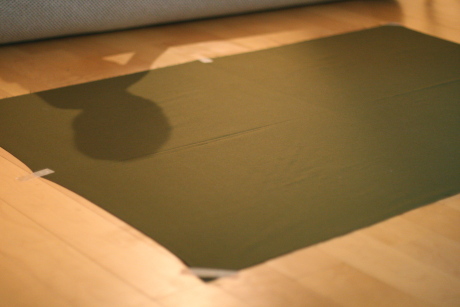
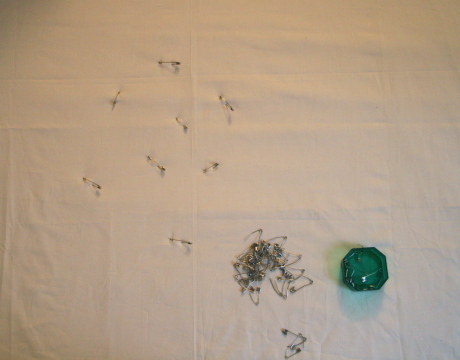
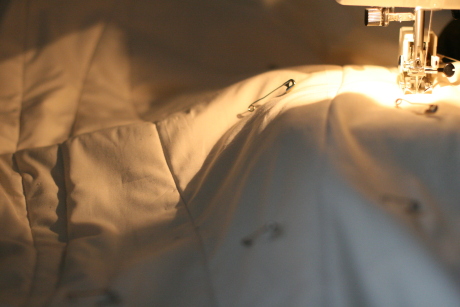
second. baste the quilt. very important to do a good job basting so there is no unfortunate pinching or clumping of fabric while quilting it on the machine. usually best to do this while kids are in bed since their little feet cannot resist dancing (or crawling) on large pieces of fabric stretched on the floor. begin by taping the backing to the floor as taut as possible. don't be afraid to pull. gently lay and smooth batting over taped layer. follow with "front" of quilt. smooth out and get fabric as flat as possible. starting in the center, use quilting pins (essentially safety pins with a bent arm) to secure the the three layers together. work your way out in a circle, smoothing and flattening the "quilt sandwich" as you go. the fabric should be totally smooth. be sure to go all the way to the edges.
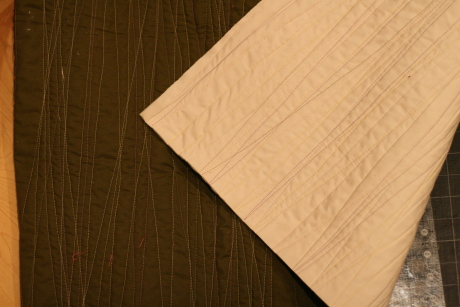
third. machine quilt. the fun and most time consuming part. with a walking foot on your machine, begin the quilting at one edge of your quilt. (quilt "parallel" to the shorter side, easier to manage). quilt at very a slight diagonal. removing basting pins as you go (don't sew over them, or let your daughter take control of the pedal for you while she also watches a show about mermaids. . . you'll regret it). when you reach the opposite edge of the quilt (going beyond edge of fabric, into the batting a bit) lift presser foot but keep needle in "down" position. rotate the blanket and quilt to the opposite edge at a slight angle once again. repeat until you quilted the length of the quilt. your quilt will look something like this:
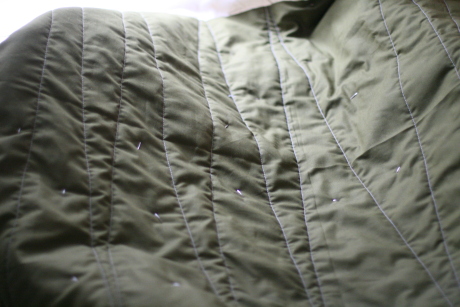
switching out thread colors (or keeping the same) repeat entire process again and again and again until you are satisfied with the amount of quilting. this uses a lot of thread but looks really great. just be sure to go slowly, feed quilt through at an even pace and watch that the fabric doesn't get gathered or bunched while quilting. the walking foot helps a ton with this, as does proper basting, but keep watch just in case. if some of your lines aren't perfect, don't worry, the other quilting lines will distract, and washing and drying does wonders for covering up small mistakes.
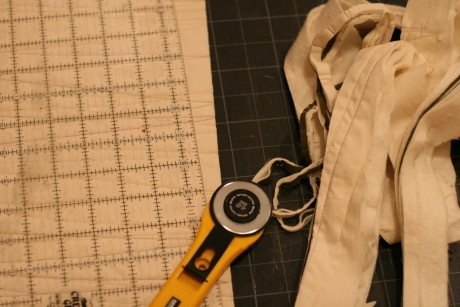
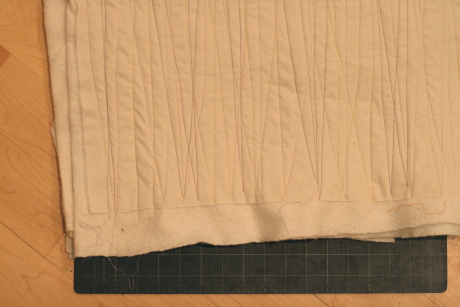
fourth. trim quilt. to get ready for binding, the quilt sandwich needs to be "squared" and trimmed. i like to trim two sides at once, folding it in half before evening it up and trimming. clear ruler and rotary cutter. check that all layers go to the very edge after trimming.
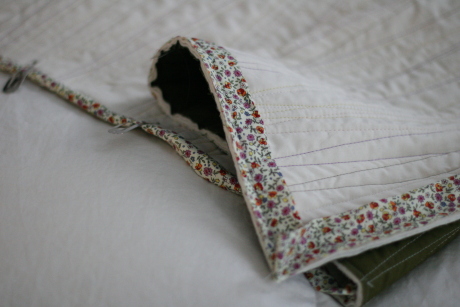
fifth. bind quilt. i use the "double fold mitered corner" binding method. the same method taught in denyse schmidt quilts book and that was taught at my quilting class at purl. i love this method, and it deserves it's own tutorial. luckily, there are a few out there. hand stitching the binding is ideal, but if you are short on time, go ahead and use your machine to stitch the binding down. don't feel bad, it will still look great. (especially in the light of a much brighter day).
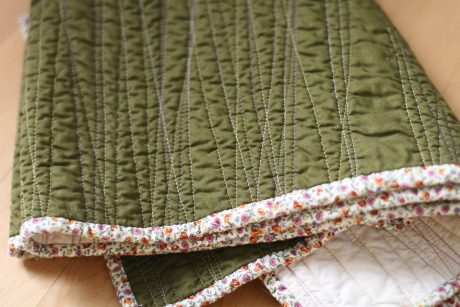
sixth. after binding and trimming all loose threads, throw your quilt into the washer and dryer. pull it out, admire it, wrap it for a gift or wrap yourself up inside. feel great. you just made a quilt, and it's modern and cool and probably took you less than 10 hours.
 123 Comments
Reader Comments (123)
THANK YOU! THANK YOU! THANK YOU ...... for sharing........
: ) : ) : ) very very very happy ............
really cool katie! and it's nice of you to share great stuff like this.
I think it would take me longer than 10 hours. You still amaze me. It looks great.
♥hugs♥
KATIE…THANK YOU!!! You are super, super, super! I can't wait to get going on SEVERAL of these. Your generosity and creativity is inspiring.
I bet you'll have to start a flickr group now… "katie's quilt".
i can't wait to make one of these. thank you, thank you!
this is almost convincing me to finish my other 2 quilts so that i can move on and start a new one. it's the binding thing, it overwhelms me and i don't know why. i'll see if those instructions you linked to get into my brain with less difficulty than other instructions I've looked at.
thanks for posting this! a portal into the secrets of your amazingness...
thanks for sharing this! making a quilt is one of my new year's resolutions.
I love it Katie.. I can't wait to try it. I have two brand new nephews and I think they both need a quilt of some kind!
Awesome!!! I think I could actually make this!!! This was a very inspiring tutorial...Thank you!!! :)
THANK YOU KATIE!!!!!!!!!!!!! I have been wanting to know how to do this for some time. Thanks for sharing. I can't wait to try it!
Okay this is the best thing. Thanks for posting these instructions. I have been wondering how you did this without a quilting frame. Genius!
Thank you for this great tutorial! This one definitely goes on my to-do list! !
T H A N K Y O U !!
i am totally going to do this for aida's quilt, which i have pulled apart now 3 different times after some very bad sewing (some of which took place in a bowling alley. should i be surprised that didn't work out for me?)
thank you so much for the tutorial!
So helpful, especially the binding information. No wonder my bindings never work. Thanks Katie!
this is so great! thanks for sharing. i'm going to try it one of these days.
I am so excited that you posted this. I love quilts, but I have an aversion to the precision required by most designs. This quilt seems like it might work for those of us who color outside the lines! Thanks for taking the time to share your lovely project!
I'm so excited to try this...
thank you so much...i have always wanted to try making a quilt but find many of them intimidating and/or old-fashioned looking. your quilt manages to look both manageable and modern. i can't wait to give it a try!
I'll have you do a "re-run" on this come July in Oregon! :) (Private lesson.... hey, I've got connections!) ily
I'll have you do a "re-run" on this come July in Oregon! :) (Private lesson.... hey, I've got connections!) ily
Yeah! Thanks for the tutorial!
So THAT'S how it's done! thank you - your tutorial is inspiring me to actually try one of these instead of always just admiring them from afar. One question though: do you actually baste with thread after pinning, or does the dozens of safety/quilting pins hold it together until you machine quilt it? thanks!
marieke-
the quilting pins hold it all together perfectly, no need for basting with thread. good luck!
everyone-
if you do make your own quilt, i'd love to see your final product! this is fun business. . .
ok, you need to live closer so you can teach me everything you know.
I can't wait to try it! I have got to find some fabric and time real soon...